

Typing usb to ide sata cable for data recovery into a search bar usually happens with the drive already out of the machine and sitting on the bench. The question is narrow: one adapter that reads a 2.5-inch SATA SSD, a 3.5-inch platter drive and an older IDE/ATAPI unit, with enough current on the drive side that the read does not drop out halfway through. Three numbers decide the purchase: the link rate, the current the adapter can put on the drive, and whether the adapter carries its own 12 V supply.
On most benches the USB 3.0 to SATA/IDE adapter with a 5V/12V power supply covers all three families, and a 22-pin USB 3.0 cable is the cheaper tool when the job is 2.5-inch SATA only. The rest of this page follows the order the checks happen in, from connector to clone.
Which Drive You Pulled Decides the Cable
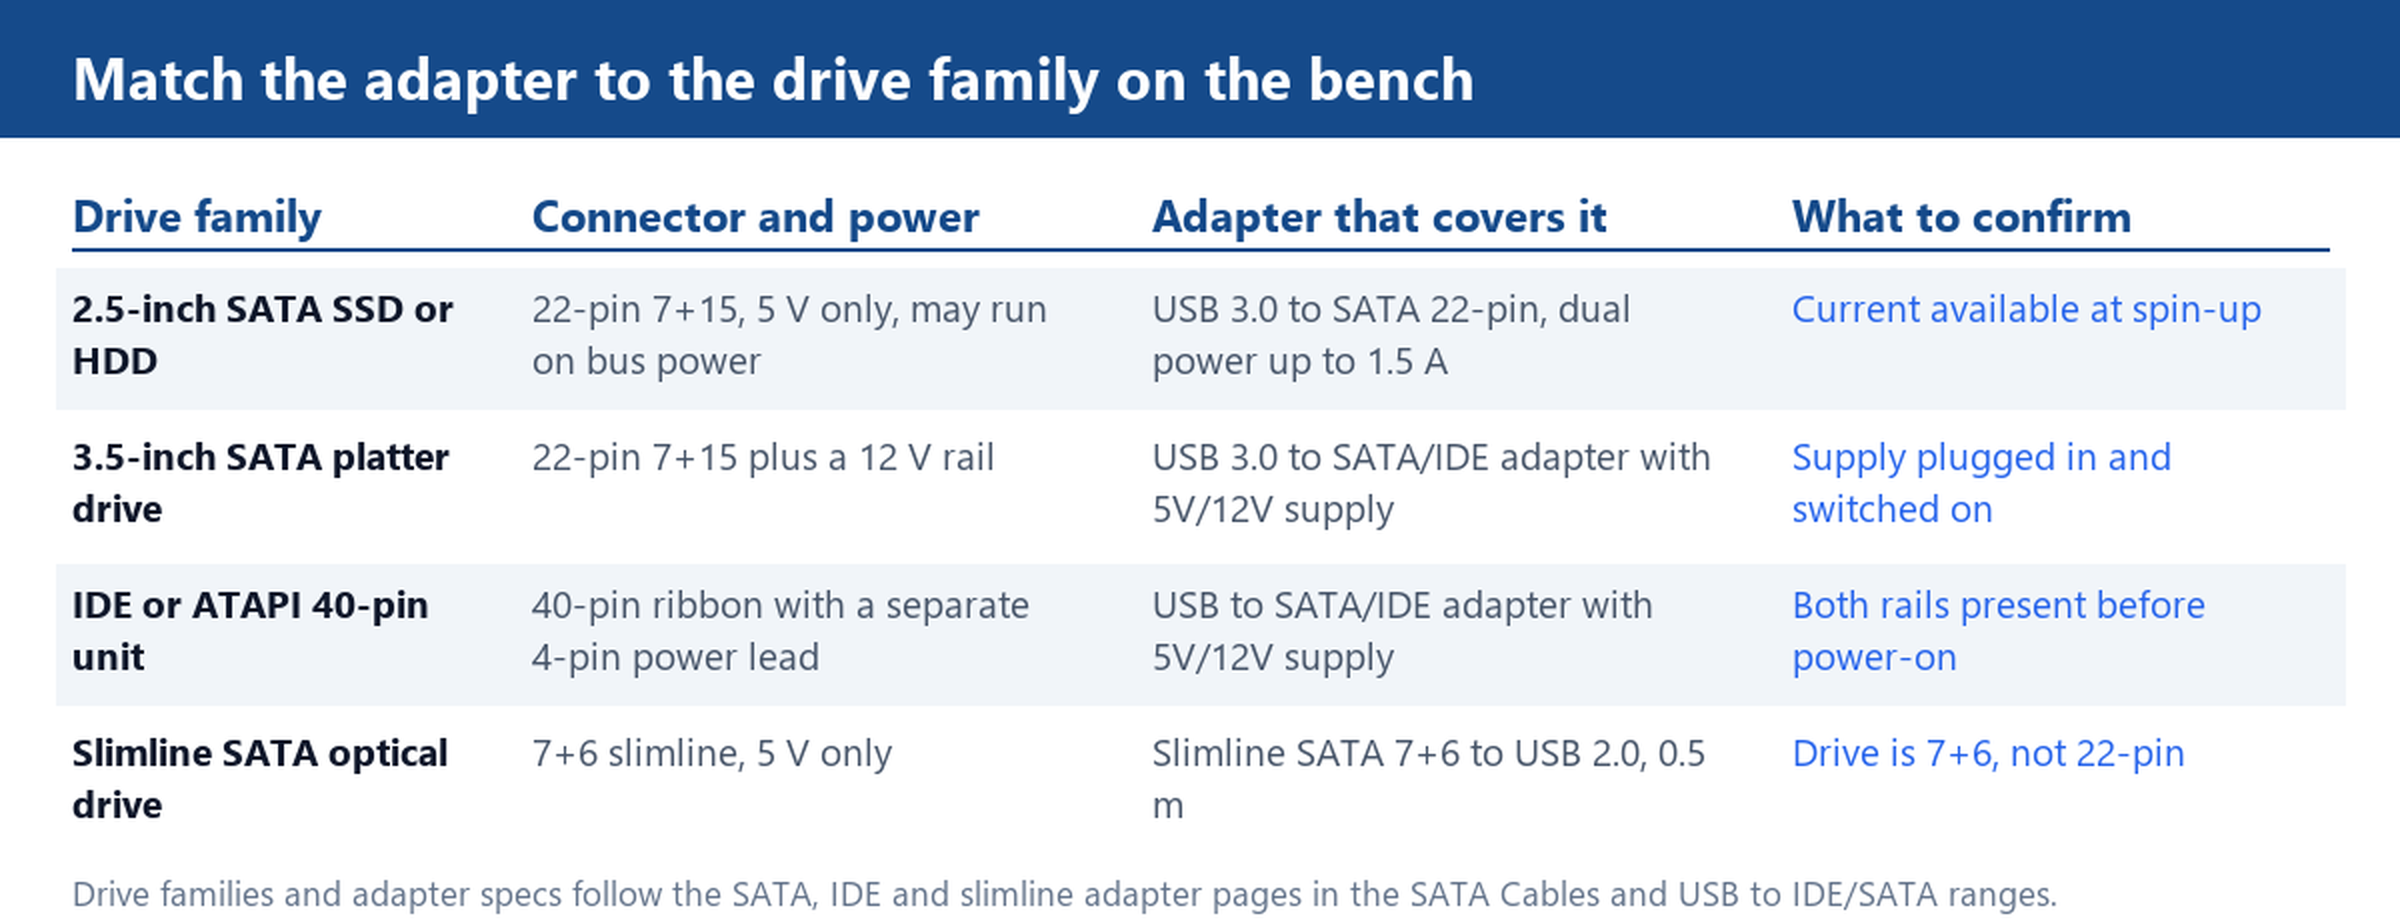
Look at the connector before the label on the drive. A 2.5-inch SATA drive has a single 22-pin connector, 7 data pins plus 15 power pins, and it runs from the 5 V rail alone. That is why a USB 3.0 to SATA 22-pin adapter cable can drive one straight from the host port: the page rates it for 2.5-inch and 1.8-inch drives up to 2 TB, up to 5 Gbps, with a dual power interface carrying up to 1.5 A in total.
A 3.5-inch platter drive uses the same 22-pin connector and the same data pins, so the connector itself tells you nothing. The difference is the 12 V rail, which no USB port supplies. An IDE or ATAPI drive goes further back again: a 40-pin ribbon plus a separate 4-pin power lead. Both of those need the adapter that ships with its own power supply, which is the 1 m USB 3.0 to SATA/IDE adapter with a 5V/12V adapter in the box.
Slimline SATA is the trap in this family. Laptop optical drives use a 7+6 connector that looks like a shortened 22-pin but is not wired for a 2.5-inch drive; those need the slimline SATA 7+6 to USB 2.0 cable, 0.5 m, which is built for that connector and nothing else.
Power Is Where Recovery Stalls
A drive that is short of current still enumerates. It appears in the operating system, the first folders open, and then the adapter drops the link partway through the copy. On the bench this looks like a failing drive when the drive is fine, so rule out power before you write anything into a report.
Three habits remove most of it. Use a port on the back of the machine rather than a hub or a front-panel extension, because a hub splits the same budget across everything plugged into it. Where the adapter has two USB plugs, connect both; the second plug exists precisely because one port is not enough for spin-up. And on a 2.5-inch platter drive, listen for the spin-up before the host sees the volume, because a drive that never spins up cleanly will not finish a long read.
The adapters here are rated rather than guessed: the 22-pin model carries up to 1.5 A across its dual power interface, and the SATA/IDE models ship with a 5V/12V power adapter so the drive side is fed from the mains and not from the host at all. When a drive keeps dropping, moving from the bus-powered adapter to the one with its own supply is the first swap to try.
5 Gbps Against 480 Mbps
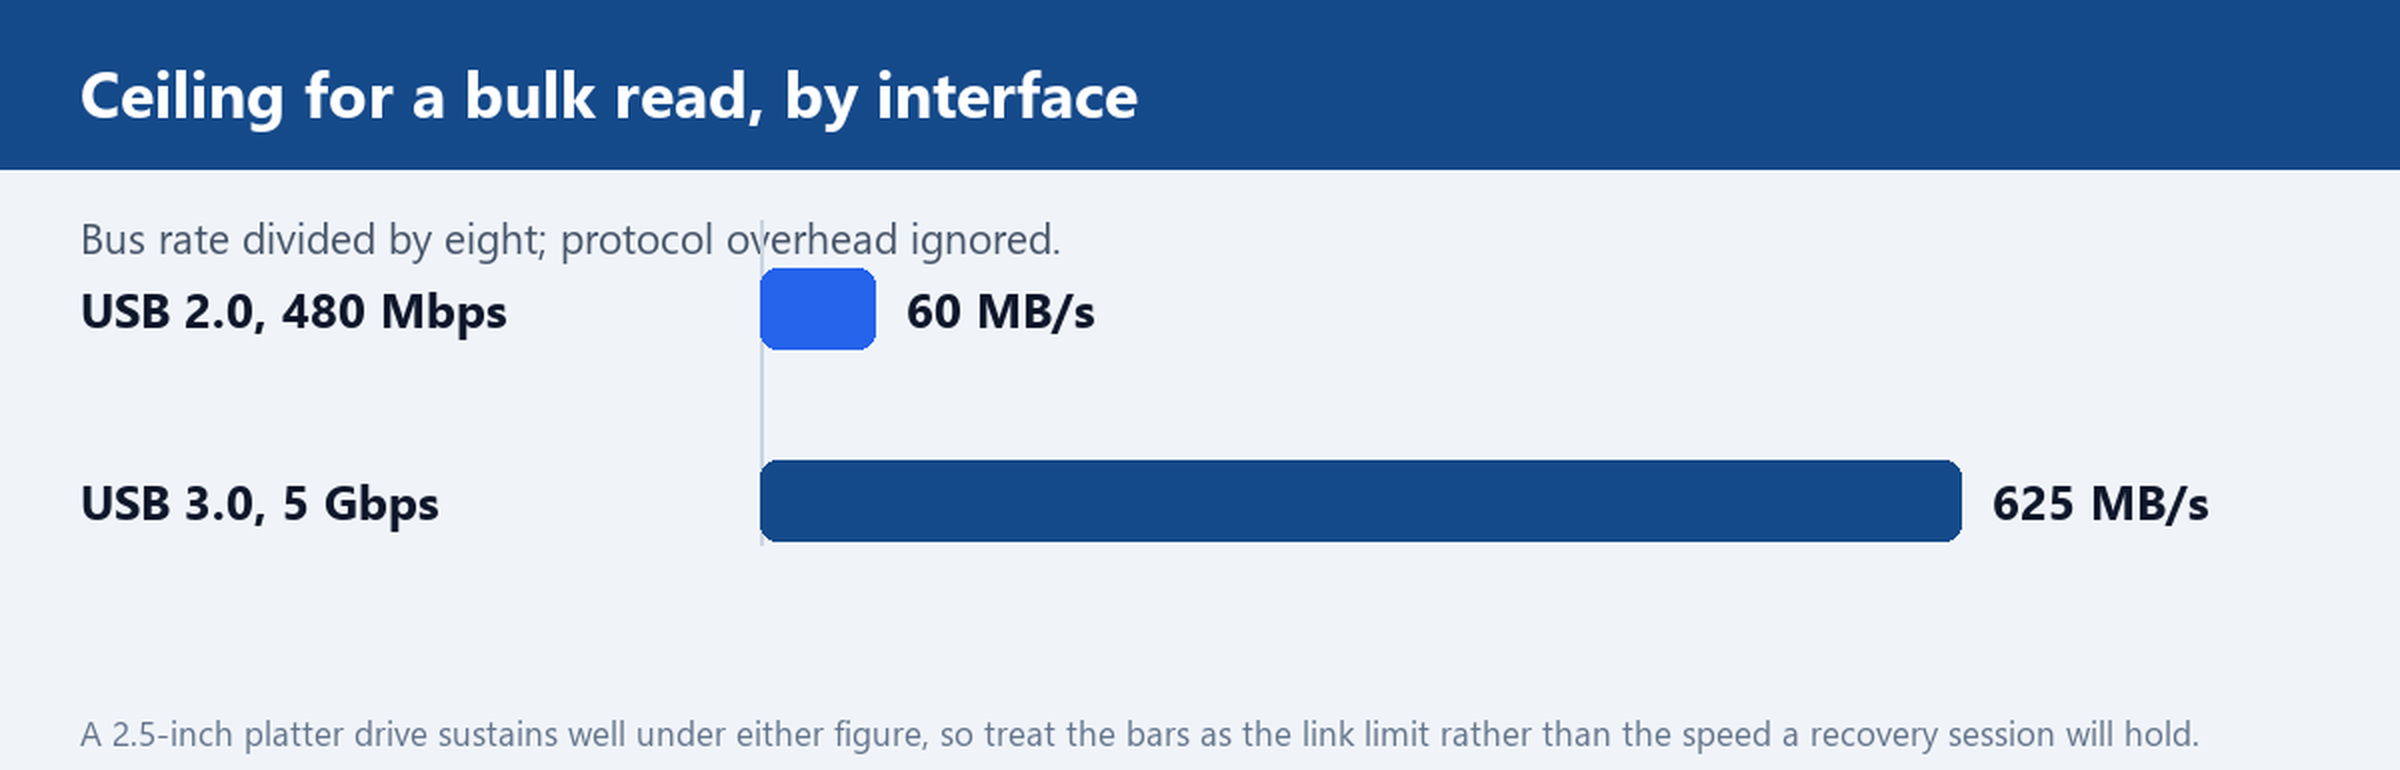
USB 3.0 runs at up to 5 Gbps and USB 2.0 at up to 480 Mbps, both as stated on the USB 3.0 cable range and the USB 2.0 cable range. Divided by eight, those bus rates come to roughly 625 MB/s and 60 MB/s before any protocol overhead, which is the ceiling the adapter and cable impose on a bulk read.
What that changes is the length of the session. A full image of a half-terabyte drive sits close to two and a half hours at the USB 2.0 ceiling and under a quarter of an hour at the USB 3.0 ceiling. A 2.5-inch platter drive sustains far less than either figure, so the real session lands somewhere between the two, but the ceiling still decides whether the copy is an afternoon or a coffee break.
Speed is not always the right answer on a sick drive. When a drive keeps aborting a read, the slower path can be the more reliable one: fewer retries per minute and a link that holds. Keep a USB 2.0 to SATA/IDE adapter on the shelf for that case, at up to 480 Mbps with the same 5V/12V supply arrangement, and use the 5 Gbps path for healthy drives and bulk copies.
The 3.5-Inch 12 V Rule
A 3.5-inch drive will not spin up on bus power, at any cable length. It needs the 12 V rail, and the adapter must bring its own supply to provide it. Both adapters in this range state the rule on the page rather than leaving it to the buyer: the USB 3.0 to SATA/IDE model ships a 5V/12V adapter, and the USB-C to SATA adapter for 2.5 and 3.5-inch drives says outright that 2.5-inch drives run on bus power while 3.5-inch drives need their own 12 V.
The sequence matters more than the parts list. Connect the drive data and power first, switch the supply on, wait for the spin-up, then plug the USB end into the host. Reversing that order means the host enumerates a drive that is not yet spinning, and the volume can drop out a second later. IDE and ATAPI units need the same treatment, with both the 5 V and 12 V rails present before power-on.
Check the barrel connector seating before blaming the drive. A partially inserted plug delivers enough voltage to light the board and not enough current to spin the platter, which reads exactly like a dead drive.
Bench Checks Before You Trust a Clone
Read the health attributes before copying anything. A SMART attribute read is a query, not a scan, and it tells you whether reallocated sectors are already climbing. If they are, clone first and investigate second, because every full surface read pushes a weak drive closer to the end.
Then map the damage with a surface read rather than a straight copy. A scan that records bad sectors lets the clone skip them and keep going; a plain file copy stops at the first unreadable block and leaves you with a partial image and no map. On a drive that is dropping out, confirm the adapter is seated square in the 22-pin connector and re-seat it once, not repeatedly, since repeated insertion is how the plastic tongue in the connector gets bent.
Finally, verify the clone instead of trusting the progress bar. Mount the image, check that the partition table reads, compare the file count against the source listing, and open two or three large files end to end. A clone that mounts but returns empty files has copied the directory structure and not the data.
Send the drive model, the capacity and the interface you pulled it from, and we will confirm which adapter covers it and quote a sample with the matching power supply.